

Homemade Breakfast Hot Pockets: A Delicious & Freezer-Friendly Recipe

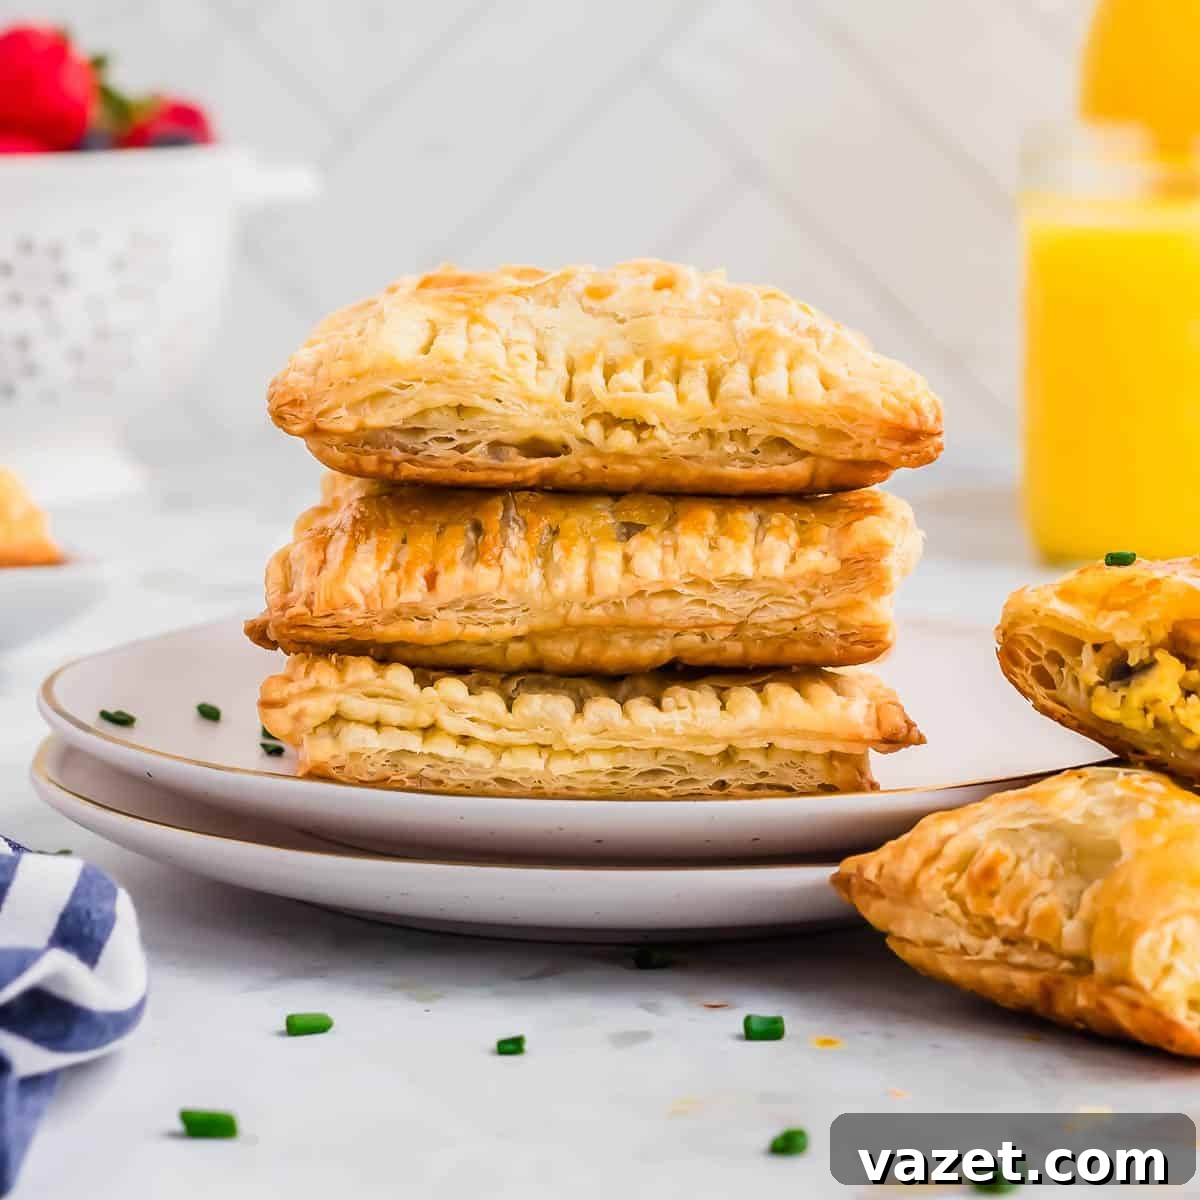
For many of us, store-bought Hot Pockets evoke a powerful sense of nostalgia, reminiscent of childhood convenience and quick meals. While those freezer aisle favorites certainly had their appeal, they often came with a list of ingredients we might prefer to avoid today. This homemade breakfast hot pockets recipe offers a delicious and significantly healthier alternative, allowing you to recreate that beloved grab-and-go experience with fresh ingredients you control. Filled with fluffy eggs, savory sausage, melted cheese, and crisp peppers, these pockets are not just a copycat version; they’re an upgrade, perfect for busy mornings or an easy dinner.
Growing up, my home wasn’t exactly a haven for processed snacks like Pop Tarts, Bagel Bites, or, indeed, Hot Pockets. These were the exotic treats we’d encounter at friends’ houses, adding to the lore of how “uncool” my parents were (at least from a child’s perspective!). Looking back, I appreciate my mom’s wisdom in prioritizing wholesome food. But as an adult, crafting homemade versions of these nostalgic comfort foods feels like a delightful act of rebellion – a way to enjoy the convenience and flavor without the questionable ingredients.
This recipe specifically reimagines the classic breakfast hot pocket, which typically features ham, cheese, and eggs. My version elevates it slightly for more sophisticated palates while remaining simple enough for kids to adore. The best part? You can feel good about what you’re eating, knowing exactly what goes into each bite. Plus, just like their store-bought counterparts, these homemade hot pockets freeze exceptionally well, making them an ideal choice for meal prepping and heating up in mere minutes whenever hunger strikes.
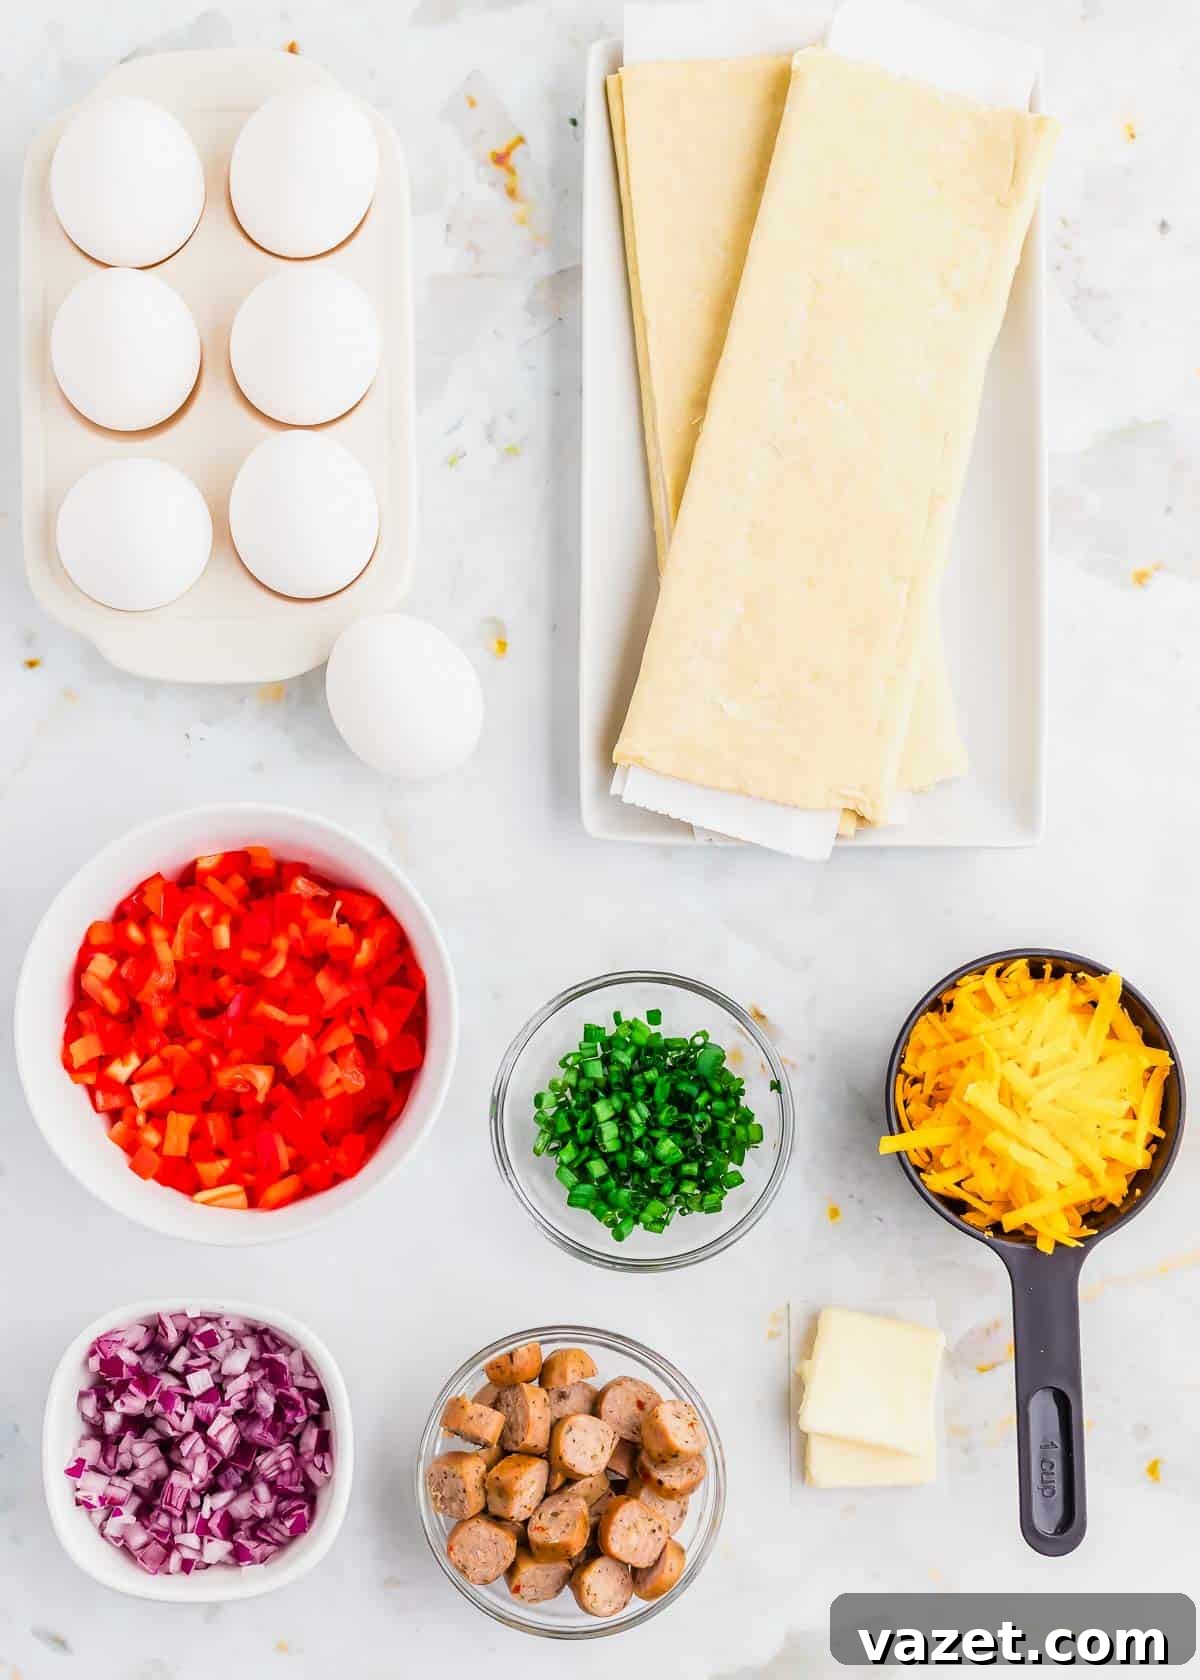
Essential Ingredients for Your Homemade Breakfast Hot Pockets
The foundation of a great hot pocket is its pastry. For this delightful breakfast variation, we opt for puff pastry, known for its flaky texture and rich, buttery flavor that perfectly complements the savory filling. While pizza dough is another excellent option for savory hot pockets (which we’ll discuss later), puff pastry truly shines here, creating a luxurious crust that’s surprisingly easy to work with. Here’s what you’ll need to gather to create these morning masterpieces:
- Puff Pastry: Two sheets, thawed according to package instructions. This forms the crisp, golden shell of your hot pockets.
- Butter: A small amount for sautéing the vegetables and sausage, adding a foundational richness to the filling.
- Breakfast Sausage: We recommend four links of chicken breakfast sausage, chopped. Chicken sausage is a leaner choice, which balances the richness of the puff pastry beautifully. Feel free to use pork sausage if preferred.
- Red Bell Pepper: One, finely chopped, adds a touch of sweetness and vibrant color to the scramble.
- Red Onion: A quarter of a finely chopped red onion contributes a mild, savory note that cooks down wonderfully.
- Eggs: Seven large eggs are needed for the scrambled filling and a single egg for an egg wash, which helps achieve that desirable golden-brown crust.
- Cheddar Cheese: One cup of grated cheddar cheese, a classic choice for its meltability and sharp flavor, binding the filling together.
- Green Onion: One finely chopped green onion for garnish, adding a fresh, aromatic finish.
Customizing Your Breakfast Hot Pocket Filling
One of the greatest joys of homemade cooking is the freedom to customize. These hot pockets are incredibly versatile, allowing you to easily adjust the filling to suit your family’s tastes or whatever ingredients you have on hand. Don’t be afraid to experiment with different combinations, keeping similar amounts of ingredients to maintain the perfect filling-to-pastry ratio.
- Vegetable Swaps: Instead of or in addition to red bell pepper and red onion, consider finely chopped mushrooms, spinach (wilt it first!), broccoli florets, or even finely diced zucchini. These vegetables cook down well into the egg and cheese scramble, adding nutrients and flavor.
- Protein Alternatives: If breakfast sausage isn’t your preference, ground turkey, ground chicken, or even Canadian bacon can be excellent substitutes. For a vegetarian option, a tofu scramble or black beans with spices could work beautifully. These are also a fantastic way to utilize leftover ham, much like our mini ham and cheese breakfast pies.
- Cheese Varieties: While cheddar is a staple, feel free to swap it for Monterey Jack, colby, or even a blend of your favorite cheeses for a different flavor profile.
- Herb & Spice Boosts: Elevate the flavor with additional seasonings. A pinch of garlic powder, onion powder, smoked paprika, dried basil, rosemary, or a dash of hot sauce can transform the filling. Fresh chives or parsley would also add a lovely fresh element.
Step-by-Step Guide to Crafting Perfect Breakfast Hot Pockets
Creating these delightful breakfast hot pockets is a straightforward process that yields incredibly rewarding results. Follow these detailed steps to ensure perfectly cooked, golden-brown pastries every time.
- Prepare Your Oven and Baking Sheet: Begin by preheating your oven to 425°F (220°C). Lightly grease a large baking sheet or line it with parchment paper for easy cleanup.
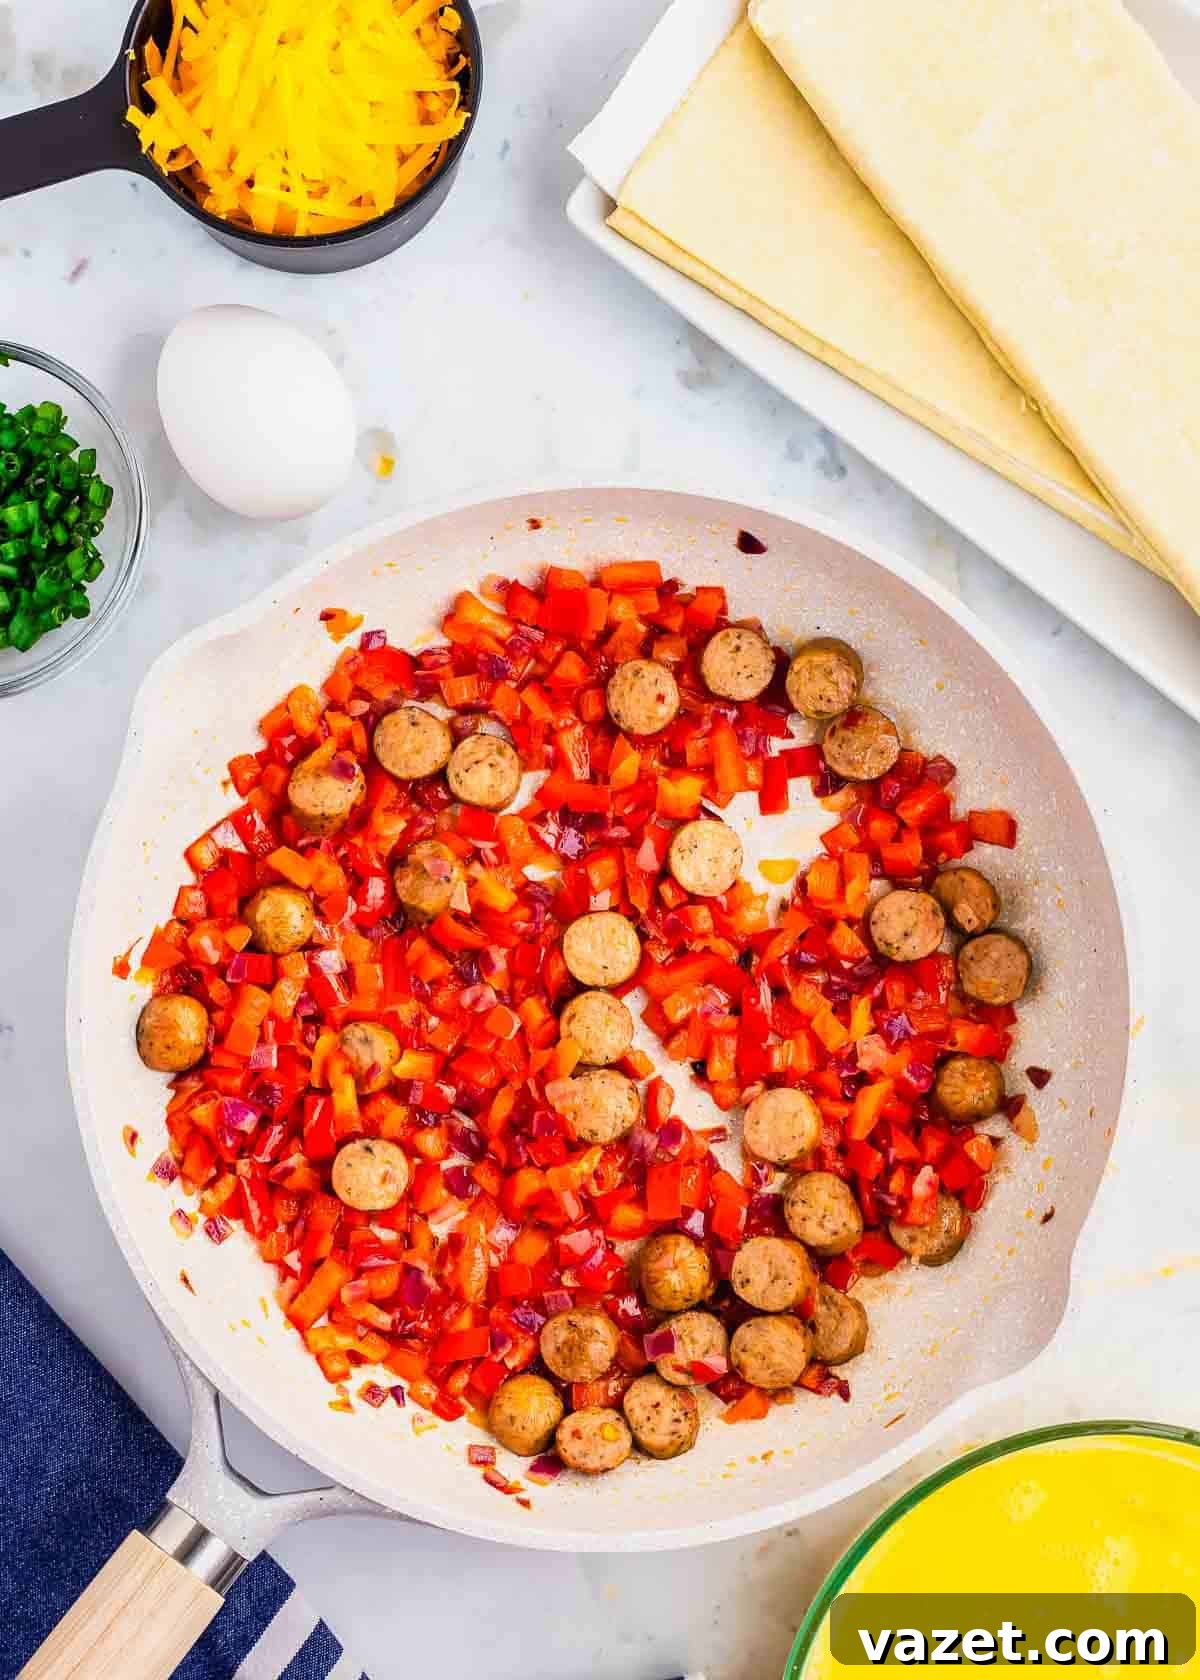
- Make the Flavorful Filling: In a large skillet, melt the butter over medium-high heat. Add the finely chopped red onion, red bell pepper, and chopped chicken sausage. Sauté for about 5 minutes, stirring occasionally, until the vegetables begin to soften and the sausage is heated through and lightly browned. This step builds the savory base for your hot pockets.
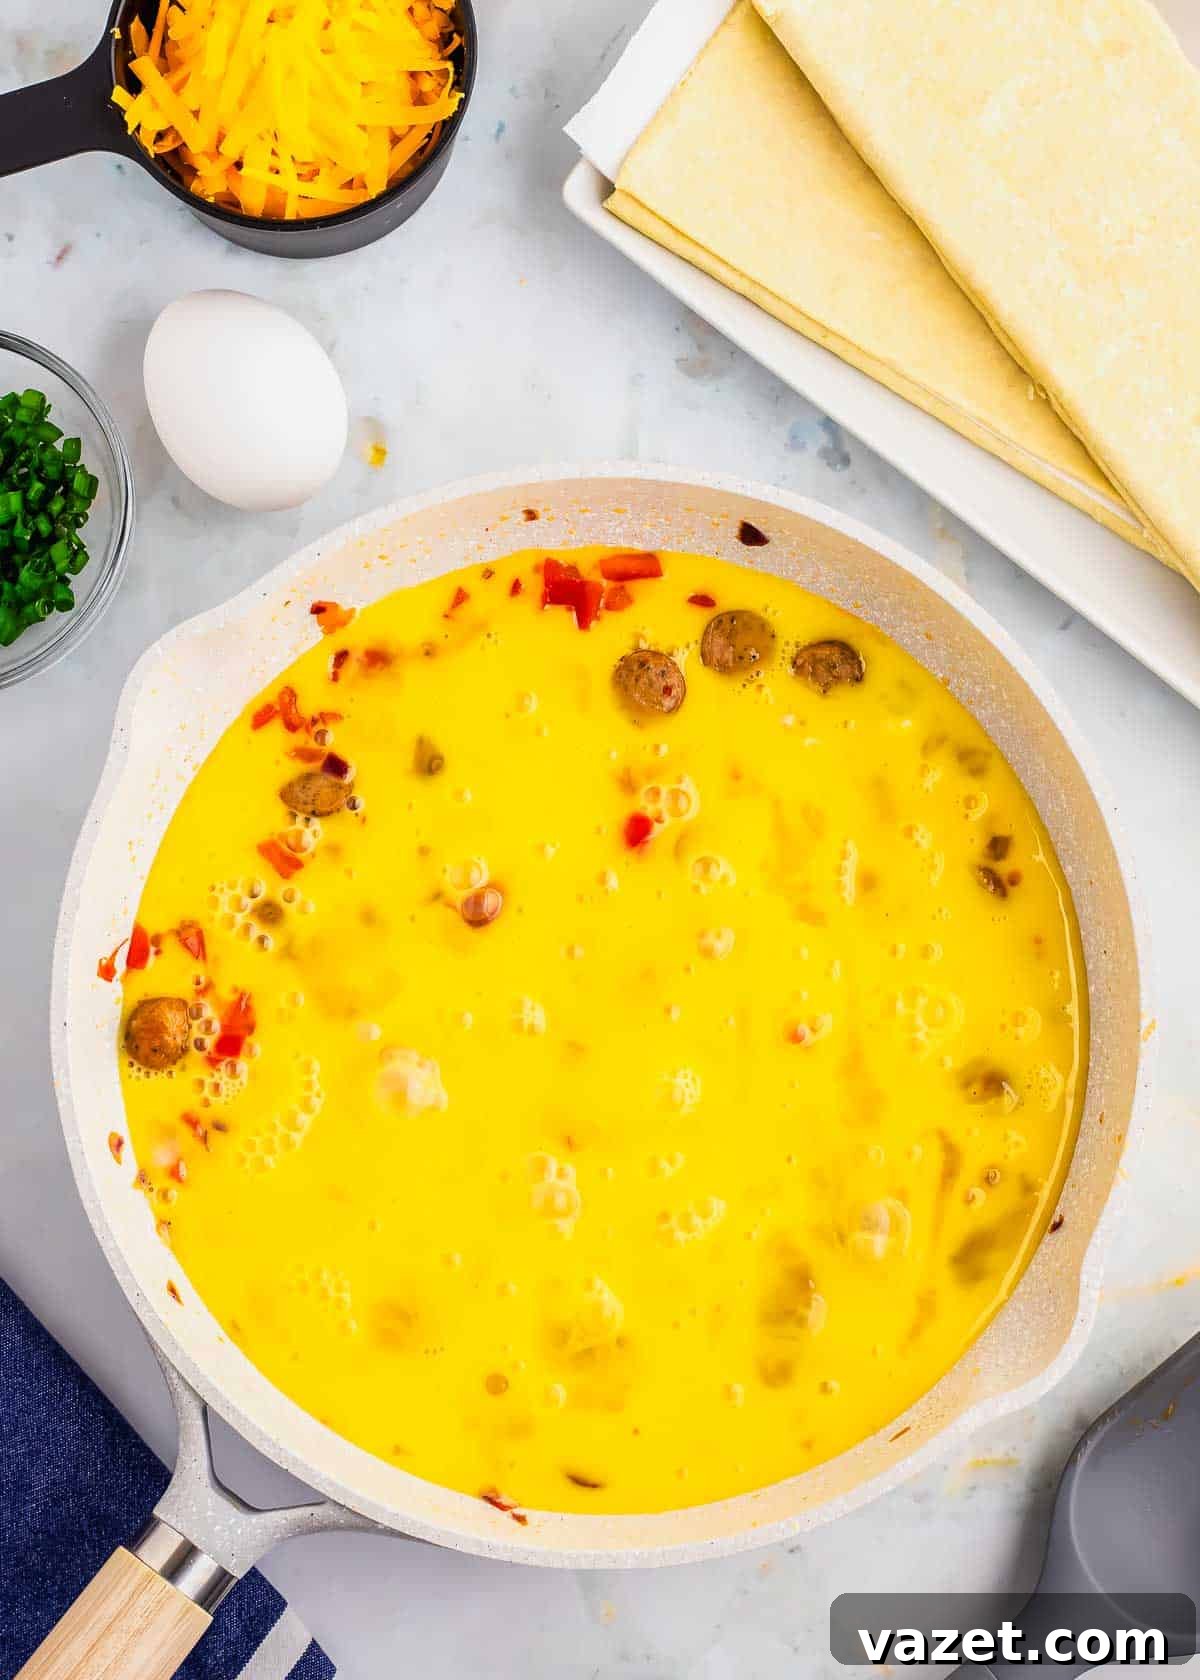
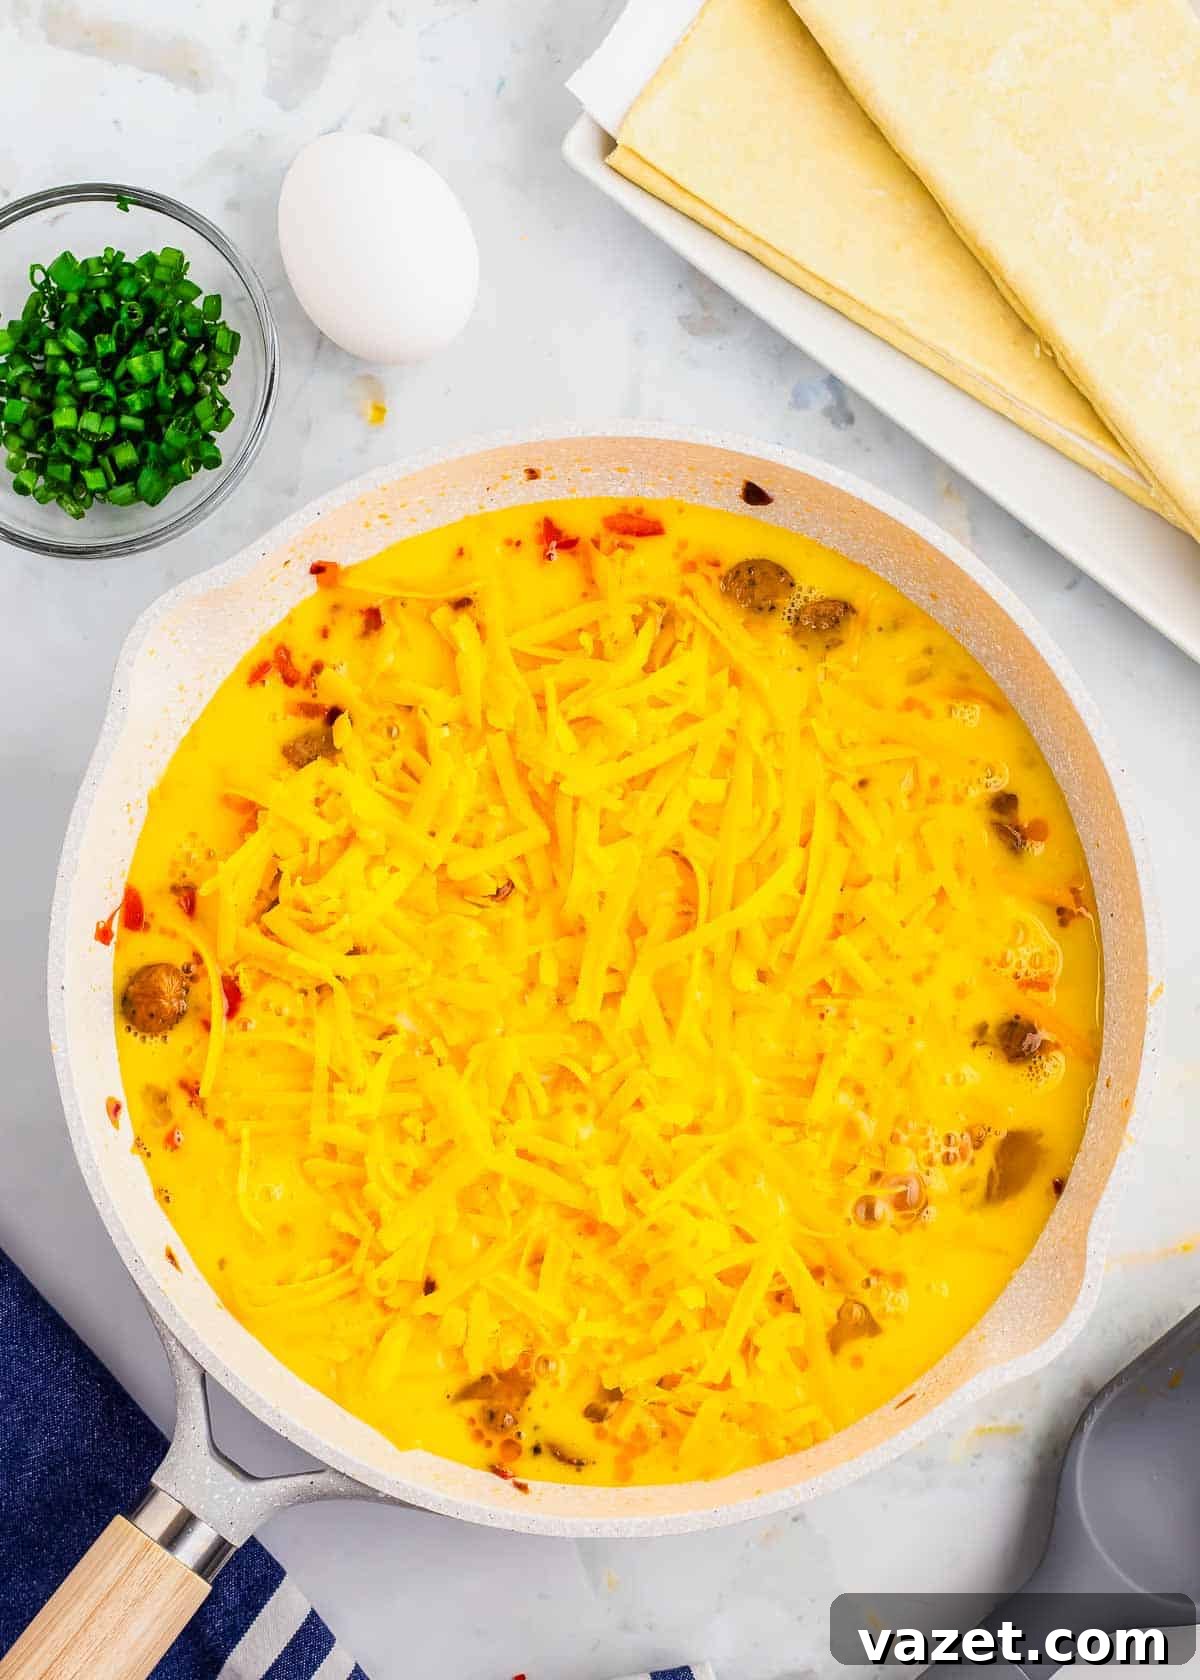
- Scramble the Eggs: While the vegetables and sausage are cooking, beat six of the eggs in a medium bowl until well combined. Pour the beaten eggs into the skillet with the sautéed mixture. Sprinkle the grated cheddar cheese evenly over the eggs. Using a spatula, gently stir and scramble the mixture until the eggs are just cooked through and no longer runny, typically 1-2 minutes. Be careful not to overcook the eggs, as they will continue to cook slightly in the oven. Remove the skillet from the heat and transfer the egg and sausage mixture to a plate or shallow dish. Refrigerate it for a short period to allow it to cool down; this prevents the puff pastry from becoming too warm and difficult to handle.
- Prepare the First Puff Pastry Sheet: Unfold one sheet of thawed puff pastry onto a lightly floured surface. Using a sharp knife or pastry wheel, cut the pastry lengthwise into three equal sections. Then, cut across the center of these sections to create a total of six even rectangles of puff pastry. These will form the bottom half of your hot pockets. Carefully transfer these six rectangles to your prepared parchment-lined baking sheet and place them in the refrigerator to keep them cool while you prepare the second sheet.
- Prepare the Second Puff Pastry Sheet: Lightly flour your countertop or work surface. Unfold the second piece of thawed puff pastry. Using a rolling pin, gently roll out the pastry until it’s approximately four inches wider and longer than its original size. This extra surface area will allow for a slightly larger top crust, providing more room to seal the hot pockets securely. Cut this rolled-out puff pastry into six rectangles, mirroring the size and shape of the first set of rectangles.
- Assemble the Hot Pockets: Retrieve the baking sheet with the refrigerated puff pastry rectangles from the fridge. In a small bowl, beat the remaining single egg to create an egg wash. Lightly brush the edges of each refrigerated puff pastry rectangle with this egg wash. Spoon the cooled egg and sausage filling evenly onto the center of each of these puff pastry bases, leaving a clear border around the edges. Sprinkle a bit of the finely chopped green onion over the filling.
- Seal the Hot Pockets: Carefully take one of the larger puff pastry rectangles (from the second sheet) and lay it directly over a filled base rectangle. Gently align the edges. Using the tines of a fork, firmly crimp the edges of the two puff pastry pieces together, sealing the filling securely inside. Work your way around the entire perimeter of each hot pocket to ensure a tight seal. Repeat this process for all remaining filled rectangles.
- Bake to Golden Perfection: Brush the tops of all the assembled hot pockets with the remaining egg wash. This will give them a beautiful golden sheen. Using a sharp knife, make two or three small slashes on the top of each hot pocket. These vents allow steam to escape during baking, preventing the pastry from puffing up too much and potentially bursting. Transfer the baking sheet to the preheated oven and bake for 25-30 minutes, or until the hot pockets are deeply golden brown and puffed.
- Cool Before Serving: Once baked, remove the pan from the oven. It’s crucial to let the pastries cool for at least 10 minutes on the baking sheet before serving. This allows the filling to set and prevents burns from the hot, molten cheese and egg mixture.



Master the Art of Freezing and Reheating Homemade Hot Pockets
One of the most appealing aspects of both store-bought and these homemade hot pockets is their incredible freezer-friendliness. Batch cooking these breakfast delights means you’ll always have a quick, satisfying meal ready to go, saving you time and effort on busy mornings. Here’s how to properly freeze and reheat your homemade hot pockets to maintain their delicious texture and flavor.
Freezing Instructions:
To ensure your hot pockets freeze perfectly, follow these steps:
- Cool Completely: After baking, it is absolutely essential to let the hot pockets cool down to room temperature. Rushing this step can lead to condensation inside the wrapping, which can result in soggy pastries when thawed or reheated.
- Individual Wrapping: Once cool, wrap each hot pocket individually. Start with a layer of plastic wrap, ensuring it’s sealed tightly around the pastry to prevent freezer burn.
- Double Protection: For an extra layer of protection against freezer burn and to maintain freshness, wrap each plastic-wrapped hot pocket in aluminum foil. This dual-layer wrapping provides an excellent barrier.
- Storage: Place the individually wrapped hot pockets into an airtight freezer-safe bag or container. Label the bag with the date. Properly stored, these breakfast hot pockets will keep beautifully in the freezer for up to 2-3 months.
Reheating Methods for Optimal Crispiness:
While a microwave is the quickest option, it can often leave puff pastry-based items a bit soggy. To best maintain the desirable crispy, flaky texture of your homemade hot pockets, consider these methods:
- Toaster Oven (Recommended): This is often the best method for reheating. Place a frozen (or thawed) hot pocket directly into a toaster oven preheated to around 350-375°F (175-190°C). Bake for 15-25 minutes if frozen (until heated through and crispy), or 8-12 minutes if thawed. The smaller space and direct heat help to crisp up the pastry.
- Air Fryer (Excellent Alternative): The air fryer is another fantastic choice for achieving a crispy exterior. Place a single frozen hot pocket in the air fryer basket (do not overcrowd). Air fry at 350°F (175°C) for 10-15 minutes, flipping halfway through, or until thoroughly heated and golden. Adjust time for thawed hot pockets.
- Conventional Oven: If you’re reheating a larger batch, the regular oven is ideal. Preheat your oven to 375°F (190°C). Place frozen hot pockets on a baking sheet and bake for 20-30 minutes, or until hot throughout and the pastry is crisp. For thawed hot pockets, reduce the baking time to 10-15 minutes.
- Microwave (Quick but Less Crispy): If time is of the essence and crispiness isn’t your top priority, you can microwave a frozen hot pocket for 1-2 minutes, or until heated through. Be aware that the pastry might be softer and less flaky with this method.
Beyond Breakfast: Savory Pizza Hot Pockets
The beauty of the hot pocket concept lies in its versatility. While we’ve focused on a delectable breakfast version, this method can easily be adapted to create classic savory hot pockets reminiscent of pizza. The key difference here is often the choice of dough and the filling ingredients. For savory hot pockets, pizza dough (either homemade or store-bought) is often preferred over puff pastry, offering a chewier, bread-like crust that perfectly complements traditional pizza fillings.
Crafting Pizza Hot Pockets:
To make the pizza hot pocket recipe, simply swap the puff pastry for your preferred pizza dough. Roll out the pizza dough in a similar manner to how you prepared the puff pastry, creating rectangles for the base and top layers.
The core ingredients you’ll need for a classic pepperoni pizza hot pocket are:
- Pizza Sauce: Your favorite marinara or pizza sauce provides the essential tangy base.
- Grated Mozzarella Cheese: A generous amount for that perfect melt and stringy pull.
- Pepperoni Slices: The quintessential pizza topping for a savory kick.
Since most pizza hot pocket fillings don’t require pre-cooking (unless you’re adding cooked sausage or vegetables), you can simply spoon the pizza sauce onto your dough base, then layer with pepperoni and mozzarella cheese. Seal the hot pockets using the same crimping technique with a fork, and brush the tops with an egg wash before baking to achieve a beautiful golden crust. Bake until the crust is golden and the cheese is bubbly.
Feel free to unleash your inner pizzaiolo and add any of your favorite pizza toppings to customize these savory hot pockets. Olives, sliced bell peppers, mushrooms, cooked ground beef, or Italian sausage are all fantastic additions. These pizza hot pockets can also be frozen and reheated with the same methods outlined for the breakfast variety, making them an excellent meal prep option for lunch or dinner.

Why This Copycat Hot Pocket Recipe Will Become Your Go-To
While the convenience of a store-bought hot pocket is undeniable, this homemade version offers so much more than just ease. It transforms a simple grab-and-go food into a wholesome, delicious, and deeply satisfying meal that you’ll be proud to serve. Here are compelling reasons why this copycat recipe deserves a permanent spot in your culinary repertoire:
- Kids Love These!: The handheld size and the ability to customize fillings make these hot pockets an instant hit with children of all ages, from toddlers to teenagers. They’re fun to eat and a great way to sneak in some extra vegetables.
- You Control the Ingredients: This is arguably the biggest benefit. Say goodbye to preservatives, artificial flavors, and a lengthy list of unpronounceable ingredients. With this recipe, you know exactly what goes into your food, giving you peace of mind whether you’re enjoying them yourself or packing them in a child’s lunchbox.
- Perfect for Breakfast or Dinner!: The versatility of these hot pockets is unmatched. While designed as a breakfast item, their hearty and wholesome filling makes them equally suitable for a quick and easy lunch or a fuss-free weeknight dinner, especially when paired with a side salad.
- Excellent for Batch Cooking & Meal Prep: If meal prepping is part of your routine, doubling or even tripling this recipe is a brilliant strategy. Stocking your freezer with a batch of these hot pockets means you’ll always have a healthy, homemade option ready for those times when you need something quick and effortless. Your future self will undoubtedly thank you!
- A Healthier Alternative to Fast Food: When you’re in a rush, the siren song of a fast-food drive-thru can be incredibly tempting. However, with a stash of these homemade hot pockets in your freezer, you have a far superior option. You’ll save money, avoid unnecessary calories, and steer clear of the often-unhealthy ingredients found in commercial fast food, providing a truly nourishing alternative you can grab on your way out the door.
More Delightful Handheld & Breakfast Recipes to Try
If you’re a fan of doughy, satisfying recipes with a hidden stuffing, or simply love a hearty breakfast, explore these other delicious creations:
- These pizza hummus stuffed pretzels offer a unique twist on two beloved snacks, making them a must-try for savory bite-sized delights.
- For a simpler breakfast option that uses many of the same ingredients as these homemade hot pockets but without the fuss of puff pastry, try this easy breakfast quesadilla.
- Puff pastry isn’t just for savory dishes! These apple hand pies showcase its versatility, transforming a potentially complicated pie dessert into an accessible and individually portioned treat.
- If you own a Blackstone grill, these Blackstone breakfast sandwiches are a fantastic way to utilize your outdoor griddle for more than just dinner, creating hearty morning meals with ease.
Homemade Breakfast Hot Pockets Recipe
Homemade hot pockets are perfect for a healthy breakfast on the go and way better for you than the store-bought variety.
By: Gina Matsoukas
Servings: 6 servings
Prep Time: 15 mins
Cook Time: 12 mins
Total Time: 27 mins
Ingredients
- 2 sheets puff pastry, thawed
- 2 tablespoons butter
- 4 breakfast chicken sausage links, chopped
- 1 red pepper, finely chopped
- 1/4 red onion, finely chopped
- 7 eggs (6 for scramble, 1 for egg wash)
- 1 cup grated cheddar cheese
- 1 green onion, finely chopped
Instructions
- Preheat oven to 425°F (220°C) and lightly grease a baking sheet.
- In a large skillet over medium-high heat, sauté peppers, onion, and chopped sausage with the butter for about 5 minutes until peppers are softened and sausage is heated through.
- Beat 6 of the eggs in a bowl then pour into the skillet. Scatter the cheddar cheese on top and scramble into the chicken sausage mixture using a spatula. Once eggs are cooked (about 1-2 minutes), remove from heat, transfer the eggs to a plate and refrigerate to cool.
- Unfold one sheet of the thawed puff pastry and cut it into 3 even sections lengthwise. Then cut across in the center to create 6 even rectangles. Place these puff pastry rectangles onto a parchment-lined baking sheet and transfer to the refrigerator.
- Lightly flour your countertop or work surface. Unfold the other sheet of thawed puff pastry and roll it out until it’s about 4″ wider and longer than its original size. Cut into 6 rectangles in the same way you did with the first sheet of puff pastry.
- Remove the baking sheet of puff pastry rectangles from the fridge. Beat the remaining egg (the 7th egg) to create an egg wash, then lightly brush these refrigerated puff pastry rectangles with it.
- Divide the cooled egg mixture evenly on top of the puff pastry rectangles with the egg wash. Sprinkle the chopped green onions on top.
- Lay one of the larger puff pastry rectangles (from the second sheet) on top of a filled base rectangle. Crimp the edges together using the tines of a fork to seal around the entire perimeter of each hot pocket. Repeat for all remaining rectangles.
- Brush the tops of each breakfast hot pocket with the remaining egg wash, make 2 or 3 slashes through the top of the puff pastry, then transfer to the oven and bake for 25-30 minutes until golden brown and puffed.
- Remove the pan from the oven and let the pastries cool for at least 10 minutes before eating.
Notes
To freeze the hot pockets: Let them cool completely to room temperature, then wrap individually with plastic wrap and aluminum foil. Freeze for up to 2-3 months. To reheat, you can thaw them overnight in the refrigerator and then pop them in the toaster oven, air fryer, or conventional oven to crisp back up. For frozen hot pockets, simply extend the reheating time.
Nutrition Information
Nutrition information is automatically calculated and should be used as an approximation.
- Serving: 1 Serving
- Calories: 755 kcal
- Carbohydrates: 42g
- Protein: 26g
- Fat: 54g
- Saturated Fat: 17g
- Polyunsaturated Fat: 5g
- Monounsaturated Fat: 22g
- Trans Fat: 0.2g
- Cholesterol: 260mg
- Sodium: 1010mg
- Potassium: 190mg
- Fiber: 2g
- Sugar: 3g
- Vitamin A: 1424 IU
- Vitamin C: 27mg
- Calcium: 175mg
- Iron: 4mg
Additional Info
- Course: Breakfast
- Cuisine: American